
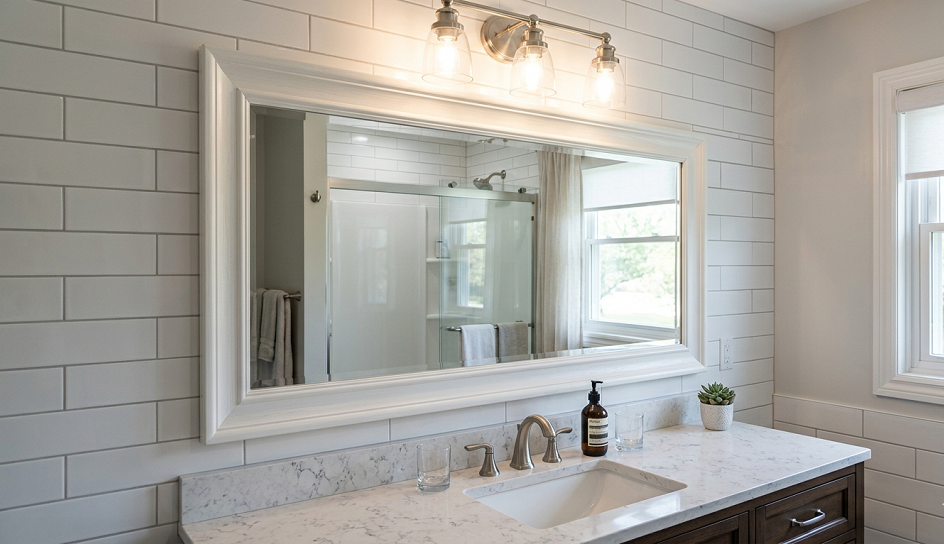
That big, builder-grade mirror stuck to your bathroom wall? The one with the naked, unfinished edges that scream “I came with this house and nobody chose me”? Yeah. That mirror has been mocking me in every bathroom I’ve ever remodeled. It’s the single cheapest-looking fixture in most homes, and — here’s the kicker — it costs almost nothing to fix.
Framing a bathroom mirror with trim and Liquid Nails is genuinely one of the best weekend DIY projects you can tackle. No demo. No drywall dust. No plumbing. In a single afternoon, you can turn that sad institutional slab into something that looks like it belongs in a boutique hotel. I’ve done this in five different bathrooms now, including one where my wife gave me exactly 48 hours to finish before her book club showed up. Spoiler: the book club was impressed.
Let me walk you through the whole process — the right way, the wrong way (I’ve done both), and everything in between.
Why Framing Your Bathroom Mirror Is Worth Every Penny
Before we get into materials and steps, let me make the case. I’ve seen homeowners spend $400–$800 replacing a perfectly functional builder mirror just because it looked cheap. That’s wild to me. For $30–$60 in trim, Liquid Nails, caulk, and paint, you get the same visual result in an afternoon.
The transformation is genuinely dramatic. A frame adds visual weight, ties the mirror into your vanity and wall color, and makes the whole bathroom look intentional and finished. Real estate agents have told me this single update helps bathrooms photograph better for listings. I believe it — I watched one flip go from “meh bathroom” to “wow, look at that vanity” just because we framed the mirrors.
The Liquid Nails method specifically is my go-to because it requires zero hardware, zero holes in the mirror, and almost zero skill level. If you can cut a straight line and press tape against a wall, you can absolutely do this.
What You’ll Need: Materials and Tools List
Here’s what to grab before you start. I recommend buying everything in one trip because that mid-project hardware store run is how you end up with a half-framed mirror for three weeks (yes, this happened to me).
Materials:
- Trim boards — I prefer 2-inch or 2.5-inch primed MDF trim, but solid wood works too
- Liquid Nails Heavy Duty construction adhesive (the original formula, not the “small projects” version)
- Painter’s tape
- Latex caulk — paintable, preferably color-matched or white
- Sandpaper (120-grit and 220-grit)
- Paint — semi-gloss holds up best in humid bathroom environments
- Wood filler or spackling paste
Tools:
- Miter saw (or a hand miter box if you’re old school like my dad)
- Tape measure
- Pencil
- Level
- Caulk gun
- Putty knife
- Small paintbrush and foam roller
A quick note on trim type: I’ve found that cheap, thin craft wood from the hobby store is a total waste of money, even if it looks pretty on Pinterest. It warps in bathroom humidity within six months. Spend the extra few dollars on primed MDF or finger-jointed pine. You’ll thank me later.
Step 1: Measure Twice, Cut Once (And Then Measure Again Because Bathroom Walls Are Rarely Square)
This is where most DIYers get cocky and then get frustrated. Measure the full height and full width of your mirror — including the very edge of the glass, not just the visible face.
Write those numbers down. Now add roughly ⅛ inch on each side. You want the trim to slightly overlap the mirror edge so it looks intentional rather than jammed up against it.
For the miter cuts: you’ll be cutting 45-degree angles at each corner, just like a picture frame. If you’ve never cut miters before — it is genuinely easy with a miter saw. The hardest part is keeping track of which direction your angle goes. My rule: always dry-fit every single piece before you commit to any adhesive. Every time I’ve skipped the dry fit, I’ve cut something wrong.
Cut your four pieces: two vertical side pieces (stiles) and two horizontal pieces (top and bottom rails). Label them with painter’s tape so you don’t mix up your angles at 11pm when your brain is fried.
Step 2: Prep the Mirror Surface (This Step Is Not Optional)
Here’s the mistake I see constantly on DIY forums: people skip surface prep and then wonder why their trim falls off in six months.
Clean the mirror edges thoroughly with rubbing alcohol and a lint-free cloth. You’re removing any soap scum, dust, or moisture. Let it fully dry — I give it at least 20–30 minutes. In a humid bathroom, I’ve even used a hair dryer on low to make sure the glass is completely dry before I go near it with adhesive.
While you’re at it, wipe down the wall on either side of the mirror. Liquid Nails bonds to the wall too, and a clean, dry surface means a stronger bond.
If your mirror has a thick chrome or plastic edge trim already on it (some builder mirrors do), you have two options: carefully peel it off if it’s not glued, or frame right over it. I’ve done both. Framing over it works fine as long as your trim is wide enough to cover the ugly edge.
Step 3: Apply Liquid Nails and Mount the Trim
Now we’re getting to the good part. Load your Liquid Nails cartridge into the caulk gun and cut the tip at a 45-degree angle — about a ¼-inch opening. Not too big. You don’t need a firehose of adhesive.
Apply a continuous zigzag bead of Liquid Nails to the back of each trim piece. Cover the full length, staying about ½ inch from each edge so adhesive doesn’t squish out everywhere. Press the trim firmly against the mirror edge and wall.
Here’s my method for holding it in place while it cures: painter’s tape. Run long strips of tape from the front face of the trim, across the glass, and onto the wall on the other side. Pull it tight. This acts like a clamp and holds the trim flush while the adhesive sets.
Start with the top piece. Then do the two sides. Finish with the bottom. This order matters — it lets gravity work with you instead of against you, and lets you make micro-adjustments to alignment before everything is locked in.
Let the Liquid Nails cure for at least 24 hours before removing the tape. I know it’s hard to wait. I have torn tape off at the 6-hour mark before and watched a corner slowly peel away from the glass. Learn from my impatience.
Step 4: Fill the Gaps and Nail Holes for a Seamless Look
Once the tape is off and the trim is solid, inspect the corners and edges. Even with perfect miter cuts, you’ll usually have small gaps at the corners or along the wall edge. This is completely normal. It doesn’t mean you failed — it means you live in a real house with real walls.
Fill corner gaps with wood filler. Smooth it with your finger or a putty knife, let it dry, then sand lightly with 120-grit, followed by 220-grit. The goal is flush and smooth, not perfect on the first pass.
Run a thin bead of paintable latex caulk along the top and bottom edges where the trim meets the wall. Also caulk where the trim meets the mirror if there’s any visible gap. Smooth the caulk bead with a wet fingertip in one long, confident stroke. Don’t second-guess it mid-swipe — that’s how you get lumpy caulk lines.
Let everything dry per the manufacturer’s recommendation before painting.
Step 5: Paint the Frame for a Finished, Professional Look
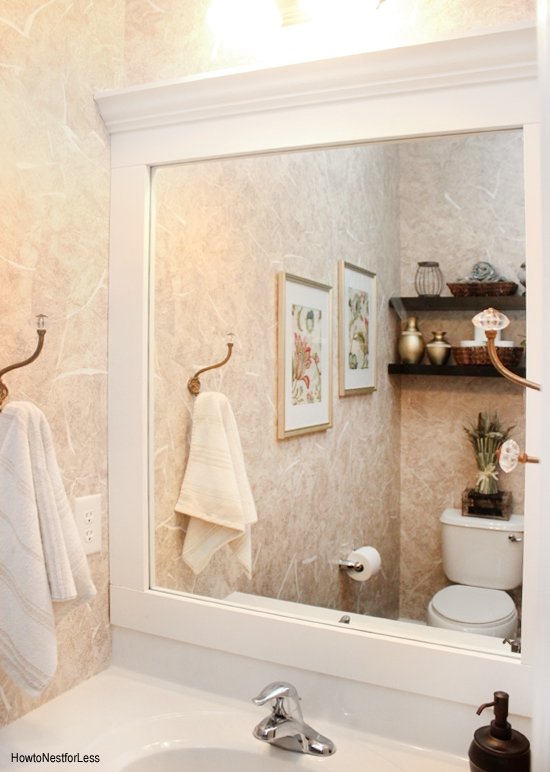
Painting is where the transformation becomes real. This is the moment the trim stops looking like “trim stuck to a mirror” and starts looking like “intentional, built-in design.”
Prime first if your trim isn’t pre-primed. Then apply two coats of semi-gloss or satin finish paint using a small foam roller for flat surfaces and a brush for corners. Semi-gloss is my strong recommendation for bathroom applications because it handles moisture and is easy to wipe clean. Flat or eggshell paint in a bathroom is one of the small decisions I regret every time.
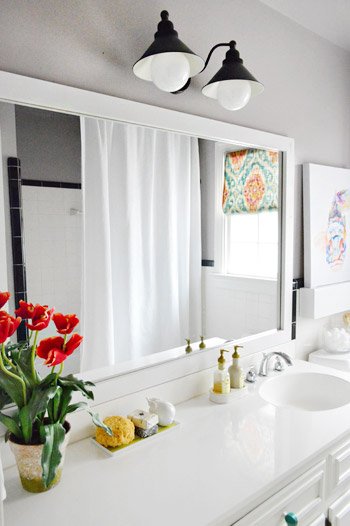
I’ve matched the frame color to the wall color for a seamless look. I’ve also gone crisp white against a bold wall color. Both work. What I’d avoid? Dark stained wood in a small bathroom. It tends to visually shrink the space, and humidity does a number on natural wood over time unless you seal it obsessively.
Step 6: Style the Space to Make the Frame Pop
Quick side note: This one’s technically beyond the tutorial, but it makes a huge difference.
Once your frame is painted and dry, step back and assess the whole bathroom wall. A freshly framed mirror often exposes just how dated everything else in the bathroom looks by comparison. This is normal. You just leveled up one element.
Consider swapping the vanity light fixture if it’s still the builder-grade Hollywood strip bar. Update the faucet handles if they’re brass and not in a good-vintage-brass way. Add a small plant on the counter. Frame a mirror, and suddenly you see the bathroom for what it is — and what it could be. It’s a gateway DIY project. You’ve been warned.
Real Talk: What Can Go Wrong (And What’s Not Worth the Effort)
Okay, let’s be honest about the failure modes, because I have experienced all of them personally.
The trim peels away from the glass. This almost always comes down to moisture on the glass during application or using the wrong adhesive. “Small projects” Liquid Nails and craft glues are not strong enough for bathroom conditions. Use the original Heavy Duty formula. Period.
Miter corners don’t meet cleanly. This happens when the mirror isn’t perfectly rectangular (more common than you’d think) or when your cuts are even slightly off. Solution: cut slightly long, test-fit, and shave off tiny amounts until the fit is right. A sharp handsaw and a miter box can actually give you more control than a power saw for final fine-tuning.
The caulk cracks after a few months. This usually means the trim shifted slightly during curing. Always wait the full 24 hours before removing tape, and don’t use the bathroom’s hot shower for the first 48 hours after installation if you can avoid it. Steam during the cure is the enemy.
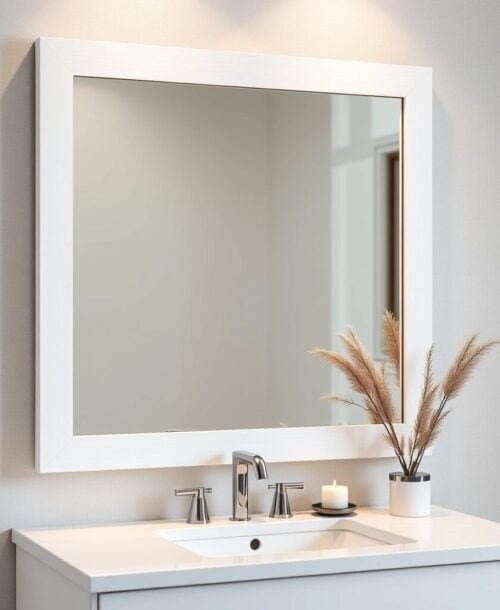
What’s not worth the effort: ornate, carved trim profiles on a small mirror. I spent way too long on a guest bathroom once trying to use colonial-style casing on a 24-inch mirror. The heavy detail looked ridiculous at that scale. Simple, flat trim or a minimal ogee profile looks cleaner and more modern. Save the ornate stuff for door frames.
One more honest note: if your mirror is already chipping, has silver spots (that’s called “silvering loss”), or is delaminating from the wall, framing it won’t fix those problems. Sometimes the mirror just needs to go.
Parting Wisdom: The $40 Upgrade That Pays You Back
This project has a better effort-to-impact ratio than almost anything else in home improvement. I’ve done full bathroom gut renovations costing $8,000, and guests notice the framed mirror before they notice the new tile. People are wired to look at mirrors — it’s literally where they look at themselves — so making that space intentional and polished lands hard.
My parting advice: don’t overthink the trim profile. Pick something simple, buy a little extra for mistakes, use real Liquid Nails Heavy Duty, and let it cure fully before you celebrate. Tape it well, caulk the gaps, paint with semi-gloss, and you’re done.
This is a Saturday afternoon project that will make your bathroom look like you spent a weekend — not a few thousand dollars.
Now I want to hear from you: have you already tried framing a mirror and run into a problem I haven’t covered here? Or are you looking at your bathroom mirror right now wondering if this could work with your specific frame or layout? Drop your question or experience in the comments below — I read every single one, and I genuinely love troubleshooting these things.